How to properly grow asters through seedlings?
The huge flower bed is striking in its variety. Along the edges there are borders of low plants with small variegated inflorescences, in the middle there are tall bushes, crowned with large lush caps. An unusually rich palette of colors from snow-white to almost black. Some flowers have several shades: the edges are light, and bright colors shine through from the inside, as if a decorative flashlight is hidden in the middle. Some inflorescences look like large daisies: a large center is surrounded by colorful petals. Others resemble roses or peonies, and beneath them are carved green leaves. There are plants on which balls of needles hang, like multi-colored hedgehogs. There are large and narrow, and terry, and feather-shaped petals. Do you want to create such beauty on your site? To do this, you do not need to purchase many different ornamental plants, you can only plant asters.
What is the best way to grow asters?
There are perennial and annual varieties of asters, you need to pay attention to this when planting them. Perennials from seeds come out small and weak, vegetative reproduction is more suitable for these varieties. Such plants do not require a lot of hassle, growing and caring for them is simple, but the same design every summer can get boring.
Annuals reproduce by seeds, from the moment when the sowing was carried out, about 4 months pass to flowering. Sowing outdoors is possible only on warm days, in mid-May, and you will have to wait for flowers until September. You can plant seeds in the fall before winter. In this case, the soil needs to be dry and frozen. The grains will overwinter under the snow, natural stratification and hardening will occur, after which the asters will grow strong and frost-resistant.
Many growers prefer to grow annual asters through seedlings. At home, it is easier to care for seedlings, it is easy to control the conditions of maintenance and development. Many diseases of these flowers must be caught at the very beginning, before the epidemic breaks out. At home, it is possible to inspect the leaves and stems of seedlings every day and determine why they turn yellow or thin. When traveling to the country house only on weekends, you can miss the time and come when the fungus has spread throughout the flower garden.
What are we going to sow?
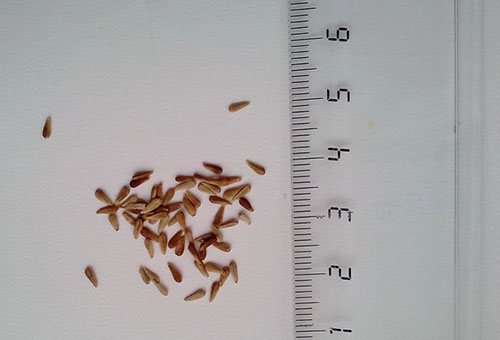
Aster seed germination ends very quickly, when buying, look at the date and purchase only materials from the last harvest. Weight is often written on the bag, but the number of seeds is not indicated, and a novice florist does not know how many bushes he can plant. When buying, remember that 1 g contains from 300 to 500 grains, and do not buy extra seed. If sowed in the second year, only half of the seeds will sprout, and sowing next summer will yield only 30%.
You can prepare the seed yourself. Choose the most beautiful and strongest bush, leave a few central inflorescences on it and wait for them to dry. The petals should darken and begin to fall off, and small fluffs will appear from the center. On a dry, clear day, cut the flowers to be sown and place the whole uncut centers in a dry, warm place. When the heads are completely dry, shake out the seeds, wrap them in paper or a cloth bag, sign the variety name and store them. It often rains in autumn, the weather is constantly wet, and it is impossible to wait for the testes to dry on the bush. In this case, after cutting, separate the head into parts and dry it disassembled. The seeds are fully ripe 40 days after the flowers bloom.
Advice
Asters in a flower bed are easily pollinated.If you want to plant your own seeds, set aside small, distant plots of land for each variety, there you will plant seed plants. If you want to experiment, take seed from the very center of the flower bed, where asters of various varieties and colors grow. You can end up with a completely unusual flower.
Sowing seeds
Sowing can begin in early April. When purchasing soil in the store, try to find special soil for seedlings of asters. If you can't get the right product, take soil for flower crops and add sand to it in a 10: 1 ratio.
You can also prepare your own composition:
- peat - 4 parts;
- garden land - 2 parts;
- sand - 1 part;
- ash - 1 glass per 10 liters of the mixture.
Stir and sift the resulting soil, then add 1 cup of perlite. This component has the ability to draw out excess moisture, and when the soil begins to dry out, it gradually moisturizes the earth. Place the soil in a double boiler and heat for about an hour. This procedure will kill the fungi that often attack aster seedlings. If it is not possible to steam the soil, pour it over with a solution of potassium permanganate or fungicide.
Seeds can also become infected with spores that cause blackleg and other seedling diseases. Before sowing, pickle the grains in a fungicide solution, the concentration and processing time should be indicated in the instructions for the preparation. Dry the seed and distribute it evenly over the top layer of damp soil. Cover the top with sand with a layer thickness of about 7 mm, it will dry the soil surface and protect the seedlings from fungal diseases. Cover the container with foil without watering: the sand itself will draw moisture from the lower layers. You can carry out stratification: keep the seeds in a damp cloth in the refrigerator at night, and warm during the day, so repeat for several days until sprouts appear, then the grains can be sown into the ground.
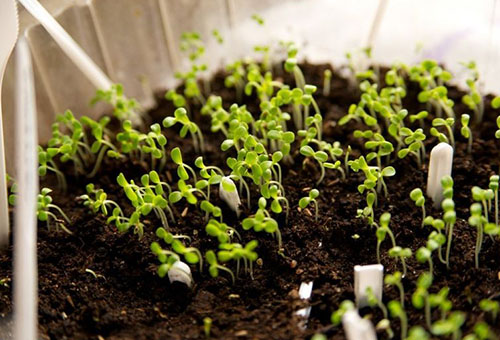
For germination, place the boxes with seeds in a warm place with a temperature of + 15⁰ to + 20⁰. Open crops for ventilation for a few minutes every day. If the surface of the sand dries up, spray it with warm water from a spray bottle. Seedlings will appear in about a week.
Aster seedling care
When you see the cotyledon leaves peeking out of the ground, remove the film and place the plantings in a bright place. Asters need proper care: weak seedlings can very quickly get sick with black leg, fusarium and other fungal diseases. Water the plantings in moderation. The root of the seedlings has already grown deep into the soil, now you can not be afraid if the sand turns out to be dry.
Watch for any fungal infection, carefully dig up the diseased specimens and destroy or continue growing them separately from healthy plants. Spray the remaining seedlings with fungicides, and spill the soil with a disinfectant solution. If the sowing was carried out in fertilized soil, there should be enough nutrients before the pick; when sowing in poor soil a week after the emergence of sprouts, you need to feed the seedlings with complex fertilizer. Do not get carried away with nitrogen, not buds develop from it, but lush and large leaves.
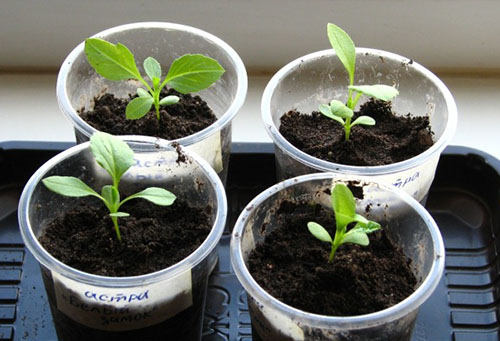
When the third leaf is formed, you can start picking. If you do not want to use purchased soil, prepare it - the same as in which the seeds were sown, only you do not need to sift. Add 1 tbsp to a bucket of soil. spoonful of complex fertilizer and mix thoroughly. Prepare containers for seedlings: cassettes, cups, so that each plant grows in an individual container and it is convenient for you to take care of the plantings. Pay attention to the drainage holes: if they are blocked by beads of plastic, clean with a knife or scissors.
Advice
If using ready-made soil, pour it out of the bag and carefully look for large lumps of fertilizer.When preparing soil at home, make sure that no sticky granules get into the soil. Such accumulations can burn the delicate roots of the seedlings.
Fill containers with soil, moisten and make small holes. Consider the roots of the seedlings, they should not touch the bottom of the container. Shorten rods that are too long. When planting, make sure that all root processes are directed vertically downward and do not bend. Seedlings often have elongated stems - deepen them into the soil so that the cotyledon leaves are at a height of 1 cm from the soil surface. Bury the hole and compact the ground slightly. Gently water the plantings in a spiral: from the edges of the glass to the middle, try to keep the spray from falling on the stem and leaves. Place the cassettes in a bright, cool place and keep the temperature no higher than 20⁰. Protect the seedlings from direct sunlight in the early days. The main care consists of timely watering and examinations of seedlings to detect diseases.
After the pick, the aster will be grown in cups for about a month, then the time will come for planting in the ground. If you have prepared the soil well for seedlings, there will be enough nutrients for them, you do not need to feed. In case of prolonged frosts, when the plants have to be kept at home for about 2 more weeks, there may not be enough fertilizer and the seedlings will weaken. The leaves will tell you about the lack of some components: learn to recognize why they turn yellow, wither or dry. Asters should be fed fertilizer for seedlingsso that they tolerate transplanting well and take root quickly. To keep the plants strong and short, provide the plantings with proper care and good lighting: they stretch too much in the twilight.
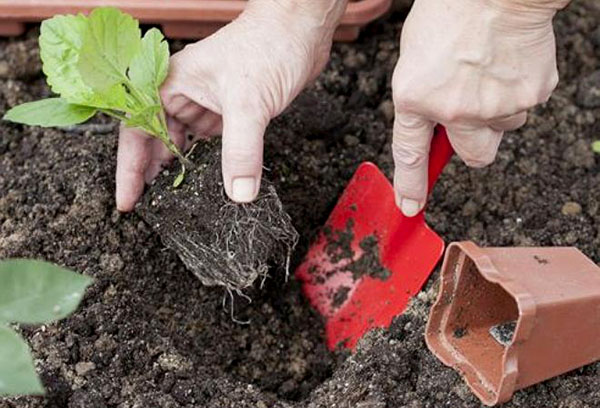
Landing in open ground
When the fifth leaf appears, start hardening the seedlings. In warm weather, take them outdoors during the day. After a while, listen to the weather forecast for the night, and if no frost is expected, leave the plantings outside. A seedling ready for planting should have 5-6 true leaves and a strong stem no longer than 7 cm.
Advice
Try not to overexpose asters at home: if you plant too mature plants, they bloom poorly.
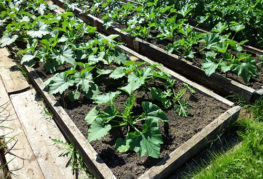
Growing flowers outdoors should take place in a sunny location. It is advisable not to plant asters where nightshade crops, carnations, gladioli, tulips and asters have recently grown. In low wetlands, plants will hurt; drainage and a high bulk bed can save the situation. Add sand to heavy and dense soil, it loosens and drains the soil.
Strong, seasoned seedlings are not afraid of frosts down to -2⁰ if they do not last long. It is believed that aster dies at -5⁰, but it all depends on the variety, the condition of the seedlings and many other conditions. It is difficult to answer the question why sometimes even at 0⁰ not a single living bush will remain, and sometimes even -7⁰ will not do any harm. In order not to risk, if there is a threat of frost, cover the planting with non-woven material.

Output
In order for the flower beds to be covered with colorful inflorescences earlier, aster seeds must be sown in boxes and flowers must be grown through seedlings. It is very important to correctly calculate the timing of sowing seeds for your area: overgrown plants will not please with lush inflorescences. Seedlings are ready to be planted in open ground at two months of age, count those from the estimated transplant date 60 days ago, and you will get the date when you need to start sowing seeds.
Seedling care includes 5 basic rules.
- Good lighting.
- Cool.
- Airing.
- Moderate watering.
- Daily checkups to check for infection.
If the seedlings do not grow well, they look depressed, then they do not have enough nutrition, they need to be fed with complex fertilizer. If you do everything right, you will be planting strong plants with strong low stems in the ground. Such seedlings will quickly take root and take root in a new place.
When moving to a flower bed, do not leave long stems.If the seedlings are stretched out, you need to plant them deep in the ground so that the lower leaves are no higher than 7 cm from the soil surface. Keep an eye on the weather forecast and cover plantings in case of frost threat. Treat your “pets” with love, provide them with good care, and in the middle of summer they will decorate the site with a variety of bright inflorescences.

and will be published shortly.