How to make drip irrigation with plastic bottles?
People who have been involved in the cultivation of garden and berry crops for several years already know firsthand how much labor will have to be spent before they manage to enjoy a delicious organic product. Therefore, many seek to make their work easier and use various devices and devices made from improvised material on their sites. One of these “know-how” is do-it-yourself drip irrigation from plastic bottles - an original and simple solution to a rather complex problem, which consists in the need for regular watering and feeding of plants. By equipping vegetable or berry beds with a drip water delivery system, you can no longer be afraid that in the absence of the owner, the plants will dry out. Moisture, continuously flowing to the roots through small holes in the plastic container, evenly wets the earthen ball, does not stagnate on the surface and does not wash out the fertile layer from the soil. For a homemade irrigation system to work, you just need to dig in a few plastic bottles near the plant and add fresh water to them in time.
Advantages of drip irrigation
Drip irrigation has many advantages over conventional water delivery. Recently, many firms engaged in the arrangement of summer cottages have offered work to carry out a stationary point irrigation system. Automated control of the water supply completely frees the owner of the site from manual work. Moisture enters the soil through small holes in the plastic pipes along the beds.
If you turn to the help of specialists, then the arrangement of such a system will require considerable investment. It is quite difficult to independently make the layout of irrigation pipes throughout the site - you need to draw up a diagram, calculate the required volume of water and other necessary parameters. In addition, you will have to dig up the whole garden, since the pipes must be deepened to a certain level.
The use of plastic bottles is a universal method of drip irrigation. It does not require any financial costs at all, because there is a free container in any farm. It is enough to make a few small holes, place the bottle in the right place - and the device is ready to use.
In addition, there are several more advantages of the "bottle" irrigation system.
- Water is supplied exactly where the plant's root system is located.
- Simultaneously with watering, you can fertilize with liquid fertilizer.
- Economical water consumption.
- You can leave the planting unattended for a while - the plants will not dry out.
- Moisture does not reach the soil surface, so there is no risk of fungal diseases.
- Without surface irrigation, the topsoil stays dry, so you don't have to frequently weed and loosen the soil.
- The drip irrigation system does not require any special maintenance; it is enough to replace the broken can with a new one.
Important!
The irrigation system, arranged using plastic bottles, has one drawback - it is impossible to replace the entire main watering with drip irrigation, which is a temporary measure.
Where to begin?
Before starting work on the arrangement of drip irrigation, you need to prepare the necessary items and tools:
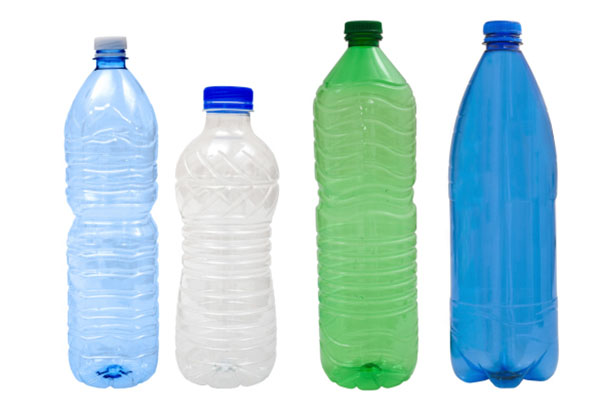
- plastic bottles (any container with a capacity of 1.5-2 liters is suitable, if you wish, you can also use 5-liter bottles left over from drinking water);
- knife or other cutting tool;
- a thick sewing needle or awl for making holes in the plastic;
- a piece of cotton or nylon fabric;
- a used ballpoint pen or other small tube.
There are several known methods for positioning and securing bottles, each of which is successfully applied in practice and allows you to forget about watering plants for several days.
Moisture source underground
The main purpose of any watering is to saturate the plant's root system with water. It is very convenient when the source of life-giving moisture is located in the immediate vicinity of the roots, that is, buried at a certain depth.
To arrange drip irrigation, take a bottle (1.5 liters) left over from mineral or carbonated water and make holes in the plastic.
Important!
For watering, do not use containers of gasoline, kerosene or acetone, since toxic substances that have settled on the walls of the vessel will enter the soil with water.
The bottle can be positioned in two ways: neck up and down. Let's consider these two options separately.
The container is buried in the ground with the neck down
Take an empty bottle and make 2-4 holes with a diameter of 1 mm with an awl or a thick needle in the neck. The more holes there are, the faster the water will flow.
A piece of cotton or nylon material must be placed inside the bottle. This is to ensure that the water is filtered and the openings are not clogged with debris that could accidentally enter the container. The bottom of the bottle is cut off, but not completely, to get a kind of cap. It protects moisture from rapid evaporation, and by lifting the lid, it will be easy to add water.
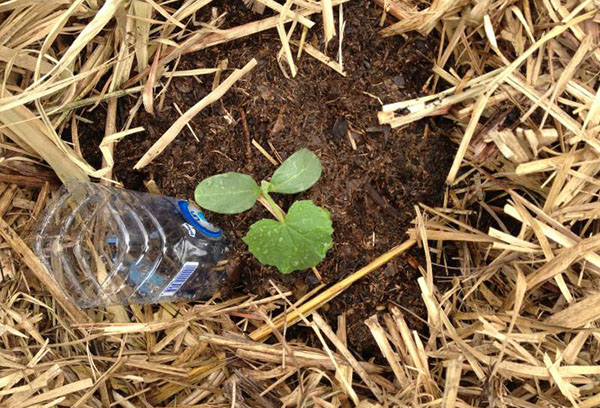
The bottle is buried 2/3 of the height near the plant, 5 cm away from the stem. It is necessary that the holes are located on the wall that looks towards the roots, otherwise the water will not reach the desired goal and will not feed the plants, but the path between them. If one bottle is buried between two plants, then the holes must be made from all sides, in a circle.
The bottle is located with the neck up
This method of organizing watering using plastic bottles is not much different from the previous one. The only difference is that holes for water outlet are made in the lower part of the bottle, stepping back 2.5 cm from the bottom, and the container is buried with its neck upward to a depth of 15-20 cm.
With this arrangement of the bottle, you will have to use a watering can or funnel to add water, since the inlet is quite narrow. But the liquid in the container is better protected from the ingress of any small debris, which means that there is no need to use filter material. In addition, animals and birds cannot drink from a container with a tightly twisted lid, and the plant will get all the water.
Important!
To release air from the bottle, a hole must be made in the lid.
In the event that it is necessary to extend the watering time, you can use a 5 liter plastic container. Several holes are made in one wall of the bottle, and in the other, located opposite, a small cap is cut out. The container is buried horizontally with the holes down and the lid up. Water is poured through the upper window.
Tip method
There is not always the desire and time to bother with bottle burial. For lazy gardeners, the simplest way to organize drip irrigation has been invented. Hardware stores sell special tips that can be screwed onto 1.5- and 2-liter bottles. In fact, they are a lid with an elongated top and resemble a narrow funnel.
The bottle is filled with water, turned upside down and placed near the irrigated plant so that the tip of the funnel comes as close to the root system as possible.With the help of drip irrigation, arranged in a similar way, it is very convenient to feed the plants. Nutrients will go directly into the root system, rather than spreading throughout the garden.
To equip drip irrigation with minimal water consumption, you can build a fixture from a plastic bottle and an empty ballpoint pen. The essence of the method is as follows.
- The spent refill is thoroughly rinsed and trimmed from the end where the writing head is.
- One of the holes is plugged with a match or a toothpick.
- Having retreated 5-7 mm from the plug, several holes with a diameter of no more than 1 mm are made with a needle.
- An outlet is made and the rod is attached to the bottle in a convenient place: near the neck, closer to the bottom or in the middle of the wall, depending on how the container with water will be installed.
It has been empirically proven that with such an economical drip irrigation system, a 5-liter bottle will last for 5 days.
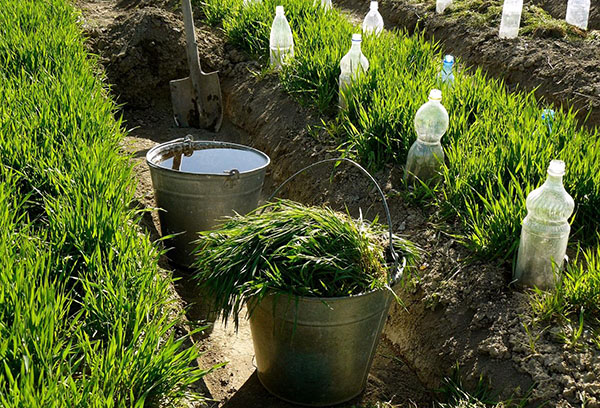
Surface drip irrigation
It is not at all necessary to bury the water bottles in the ground; you can do with surface drip irrigation. For its device, strong supports are built over the landings and containers filled with water are attached to them. Depending on the method of arrangement, holes are made in the neck or bottom of the bottle through which moisture enters the plants.
Surface irrigation differs from underground irrigation in that the water in the bottle heats up in a natural way and is already warm to the plant. In addition, you can accurately track the direction of falling drops and, if necessary, adjust the place of irrigation.
Important!
With surface watering, it is necessary to ensure that moisture does not enter the leaves of the plant and does not wash out the fertile soil layer.
Watering by evaporation
This method of arranging drip irrigation is based on the ability of water to evaporate and is as follows.
- Take two plastic bottles, one of which has a volume of 1.5 liters, and the other - 5 liters.
- The neck of a small container is cut off, the bottom of a large bottle is cut off.
- Water is poured into a small bottle and covered with a large bottle on top, so that one is inside the other.
- The entire device is installed on the garden bed, not far from the plant that is supposed to be watered.
In hot weather, under the influence of high temperatures, water in a small container begins to evaporate and condensate drops settle on the walls of a large bottle, from where they roll down and nourish the soil under the plant. The higher the ambient temperature, the more abundant watering.

Drip irrigation for indoor plants
For people who like to travel and are often absent from home, the question arises of watering indoor plants during the absence of the owners. It is good if there are helpful neighbors who will look after a blooming rose or clivia. Otherwise, your favorite flowers will have to die from lack of moisture.
There is one simple way out of this situation - drip irrigation of flowers from a plastic bottle. You can make a watering device as follows.
- Take two bottles of different sizes.
- At a large container, the bottom is cut off and a hole is made in it, equal in diameter to the lid of the second bottle.
- Several holes are made in the neck of a whole bottle, after which the bottom of the first bottle is strung onto it.
- The resulting structure is filled with water and turned over onto a tray or baking sheet from the oven. Flower pots are also installed there.
The water will slowly ooze out of the holes and feed the plant's root system for several days. The longer the vacation, the larger the container with water should be.
Knowing the secrets of the device of the drip irrigation system with your own hands, you can greatly facilitate your work on your personal plot. In addition, by arranging drip irrigation in an apartment or in a greenhouse, you do not have to worry about your indoor plants and seedlings during short absences.


and will be published shortly.